Hey folks, welcome to the second part in this series of blog posts discussing Azure AD.
Part 1 can be found here – https://www.virtualmanc.co.uk/2019/12/27/active-directory-authentication-the-past-present-and-future/
In this post we will be creating an Azure AD Tenant and then installing AD Connect to perform a sync. We will perform the following:
1) Create an Azure AD Tenant
2) Install AD Connect and perform a sync of our on-prem Active Directory domain
3) Verify that the objects have been synced
4) Test the logon
So lets begin.
Create the Azure AD Tenant
The first thing we need to do is actually create a new Azure AD Tenant. This won’t actually cost anything so you can do this for free. All you need is an Azure account.
1) To do this log into the Azure portal (https://portal.azure.com) and select “Create a resource” from the menu
2) Select Create to start the process
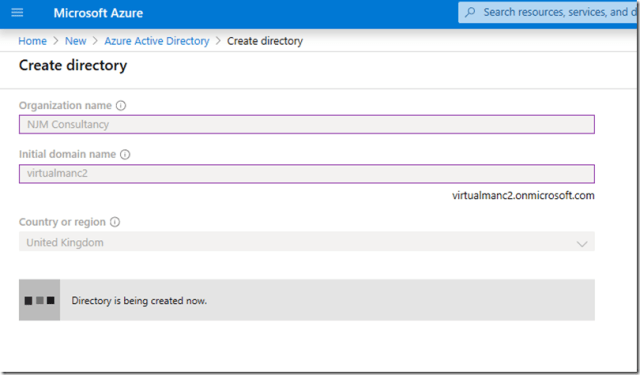
3) Enter the name of your Organization and also the domain name which you want to use. Note it says initial domain name, this can be changed to a custom domain name later if required. You also need to enter the Country or region you are based from the drop down box.
Once you are happy with your select press Create.
You should now get a message saying the Directory is being created. This should take around 1-2 minutes.
And after a few minutes we should receive notification that the directory has been created successfully
And voila! We now have our brand new Azure AD Tenant. We are now free to go and create users, groups, assign licenses etc.
Next up we will setup a sync with our on-prem Active Directory.
Install AD Connect and perform a sync of our on-prem Active Directory domain
So a Directory is pretty useless if it does not contain any users, groups or resources. If you are building a brand new infrastructure then you can go ahead and create users natively inside Azure AD. However, if you have an existing on-prem Active Directory domain we can import objects into Azure AD. This is done using Azure AD Connect.
Note this does not have to be installed on a domain controller. It can be installed on any server running preferably Windows Server 2016 or Server 2019.
1) Download Azure AD Connect
You can grab the install files from here – https://www.microsoft.com/en-us/download/details.aspx?id=47594
2) Install AD Connect – once it has finished downloading run AzureADConnect.msi to begin the install
I just selected the Express Settings but if you need to change anything you can select the Custom install
3) Configure Azure AD Connect
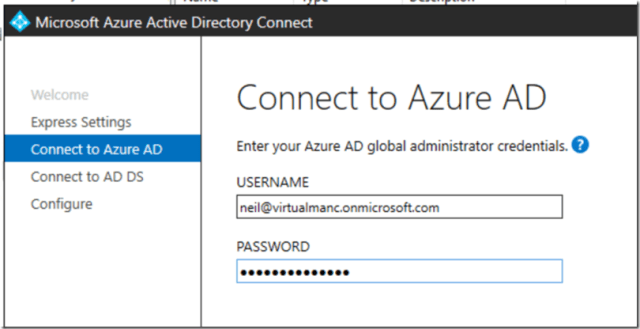
We now need to tell the AD Connect the directory information of the source and destination. You will need your Azure AD Global Administrator details and also your Enterprise Admin account details of the Active Directory domain you are syncing.
If you are unsure of what account is your Global Administrator then you can check the Global Administrators group and it should tell you
Enter the Azure AD account details of the Global Administrator
Next enter the Account details of the Enterprise Administrator of your Active Directory domain
Now we need to configure the UPN suffixes. If you have a custom domain configured then you would select it here. If you don’t (like me!) you can just tick the box at the bottom to continue. It just means that all the user logon names will be the default directory name i.e. user1@virtualmanc.onmicrosoft.com
Once you are happy with all your selections press the Install button to continue.
It will run through the install process and you should see this message saying that Configuration is complete.
Verify that the objects have been synced
OK so now that we have completed the installation which performs a sync we need to verify that our objects have been replicated into Azure AD. Here is what I have in my local Active Directory:
In the Azure Portal if you look at the Azure AD Connect tab you should see that the Sync Status is set to Enabled and a sync has been performed
And here you can see the accounts. Notice how the accounts synced from your on-prem Active Directory have the source set as Windows Server AD. The accounts provisioned directly into Azure AD will have a source of Azure Active Directory
Testing the logon
So now that we have our on-prem accounts synced with Azure AD in theory we should be able to log into them from any device with an internet connection. So lets give it a shot. Head over to https://portal.azure.com and sign in with the details of a synced account. I used one of my Test users (testuser1@virtualmanc.onmicrosoft.com)
Enter the password for the account. Note this will be the password from your on-prem Active Directory, they are also migrated across.
And voila! We have successfully logged into the Azure portal using our synced Azure AD account
I hope you enjoyed this post. In the next post we will do something useful with our shiny new Azure AD Tenant.
We can now use this for authentication for many different cloud services, VDI & DaaS solutions. In the next post I will show an example of this.


