Hey folks!! I hope you are all keeping well in these horrible times are currently experiencing. I recently did a presentation at the UK Citrix User Group on the topic of leveraging Citrix to deploy VDI Desktops in the cloud, so I figured I had better actually deploy some VDI Desktops in the Cloud using Citrix!!
In this post we will deploy and connect to a MCS created VDI Desktop in Citrix Cloud hosted on Azure from start to finish. I hope somebody finds it useful.
We will perform the following tasks:
1) Install the Citrix Cloud Connector
2) Setup the Hosting Connection
3) Create the Master VM
4) Create the Machine Catalog
5) Create the Delivery Group
6) Assign Users
So let’s get cracking!!
Pre-Requisites
To do this you will need:
-
Citrix Cloud Subscription
- Azure Subscription with necessary permissions
- Active Directory domain controller (can by physical or virtual)
1) Install the Cloud Connector
The first thing we need to do is to install the Citrix Cloud Connector. The Citrix Cloud connector is the link between your existing on-prem network/ad infrastructure into Citrix Cloud. To download the Citrix Cloud connector sign-in to your Citrix Cloud subscription at https://citrix.cloud.com
Go to the Resource Locations menu at the top of the screen
Once in that menu we need to create a new Resource Location within Citrix Cloud.
Now we have the option to download the Cloud Connector. Make sure you download at least 2 Cloud Connectors for redundancy and size them appropriately for the amount of traffic that will be going through them.
Download the connector and begin the installation
Select the appropriate account and the Resource Location we created earlier
As you can see above, after the installation completes it runs a connectivity test to make sure that everything is OK.
Now that we have setup the link between Citrix Cloud and our existing infrastructure we now need to setup the connection from Citrix Cloud into Azure. To do this we will setup a Hosting Connection from within Citrix Cloud.
2) Setup Hosting Connection
From the Citrix Cloud Console select Virtual Apps and Desktops and then Manage
Once the Studio opens select Hosting underneath the Configuration menu
Now we need to pick where we are going to setup the hosting to. For this blog post I will be using Azure, so select Azure from the drop down menu.
Next we need to enter our Azure subscription details. Ideally this account needs to be an account with Global Admin rights. Enter your subscription ID, give a connection name and then select Create New. You will then be prompted for your sign in account details and password. Enter those and continue
Now we need to select which region we want our VMs to be created in. Note if you need to deploy to multiple regions you will need to setup multiple hosting connections.
Enter a name for the resource using your own naming standards for your company. You will also need to select the virtual network that your VMs will be created in. This virtual network needs to have connectivity back to your AD environment.
Once you are happy with all the settings, select Finish.
Congrats you have now created the hosting connection!!
3) Create the Master VM
Now we need to create our Master MCS Template. You need to go to the Azure Portal and create a new VM. Enter a suitable name. Ensure the Region is the same Region we selected earlier.
I just used a standard Marketplace VM but you can import your own custom image here if you want to.
Select the network options. Ensure that the virtual network matches what we used earlier. Press Next to continue
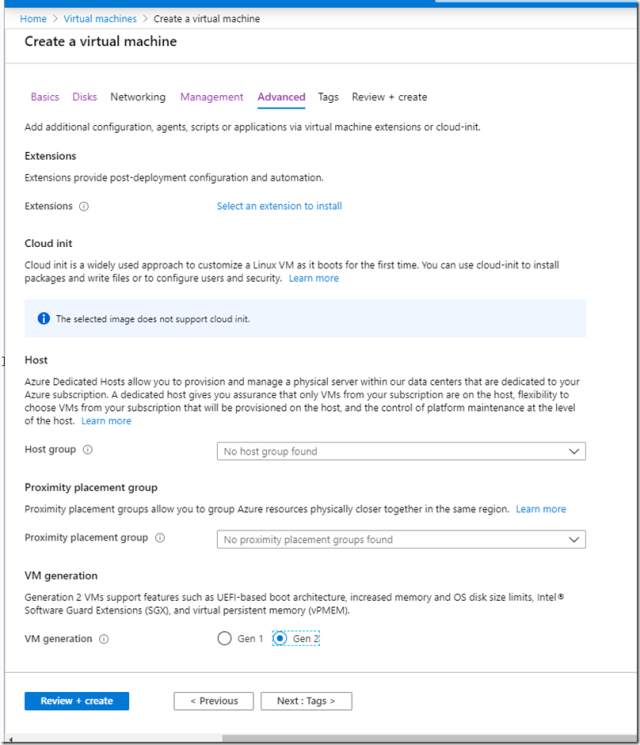
Select Gen 2 and click on Review + Create
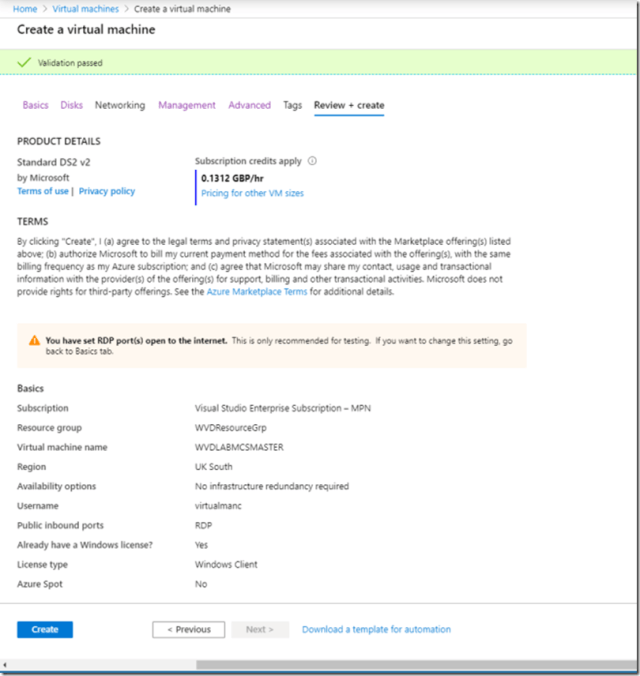
Review your settings and if you are happy select Create.
After a few minutes you should receive notification that your VM has been created.
Boot up the VM, log on, add it to the domain and install the VDA Agent. Select Create a master MCS image.
Here we need to enter the details of the Cloud Connector. This is what we will register with. Make sure that the test passes.
Check the event log and ensure that the Registration was successful. Make any other changes you want to make i.e installs apps, optimisations etc etc. Once you are ready shut down the VM.
Create machine catalog
4) Create Machine Catalog
Now that we have our Master MCS Template VM we are now ready to create our Machine Catalog. Within the Studio console go to Machine Catalog’s and Create a new one. The process is pretty similar to on-prem.
Select Next to continue. Select your type of OS that you want. If you want to use Windows 10 Multi-session select Multi-session OS.
Now select the Resource group which was created earlier.
Select the options of how you want to use your VMs.
Now we need to select the Master VM. As it states ensure that the VM is stopped and de-allocated in Azure.
Select your storage type and licence type. I would recommend Premium Storage if you can, but if you are cost saving and not to bothered about performance you can select Standard.
Now select the size of the VMs you want to create here. Be very careful as it could end up costing you a lot of money!!
If you want to use a cache then configure the options here
Here I selected to let Citrix create a resource group for me as its quicker and easier. If your environment has specific security or naming standards then pre-create the resource groups and choose them here
Select the default network which was created earlier
Now we need to select the OU where you want your computer accounts to be created. You will also need to enter a naming standard also.
Enter the details of an account which has the necessary permissions to create computer accounts and perform a domain join
Now we need to enter a suitable Machine Catalog Name. Once you are happy select Finish.
The catalog creation process will now begin.
If you look at the resource group that has been created you will see the resources being created. Note the Prepare Identity VM, that’s the same process as On-prem which is quite interesting.
And hopefully you will have success!
5) Create Delivery Group
Now that we have our machine catalog we need to create the Delivery Group so we can assign resources to our lovely users!!
Go into the Citrix Cloud Studio and select the option to Create Delivery Group.
You should see the Machine Catalog that we created earlier and select the number of machines that you want
Select whether you want to publish Desktops or Apps.
Set the user permissions. I have opted to use Citrix Cloud to assign the users, which I will go through in another section.
Give the Delivery Group a suitable name. Click finish when you are happy with everything.
And hopefully success!
Assign Users
6) Assign Users
OK now that we have everything in place we are ready to assign users to our lovely desktops. Head over into the Citrix Cloud Console and go to the Library Offerings. Find the Delivery Group info which you have just created.
Now we can assign a user.
Now we have the user assigned we can test. Enter the Citrix Cloud Gateway URL, log on and hopefully you should see the desktop you have just assigned.
Logon success!
I hope you enjoyed this post and if you have any questions or queries please feel free to drop me a message in the comments section or twitter.


