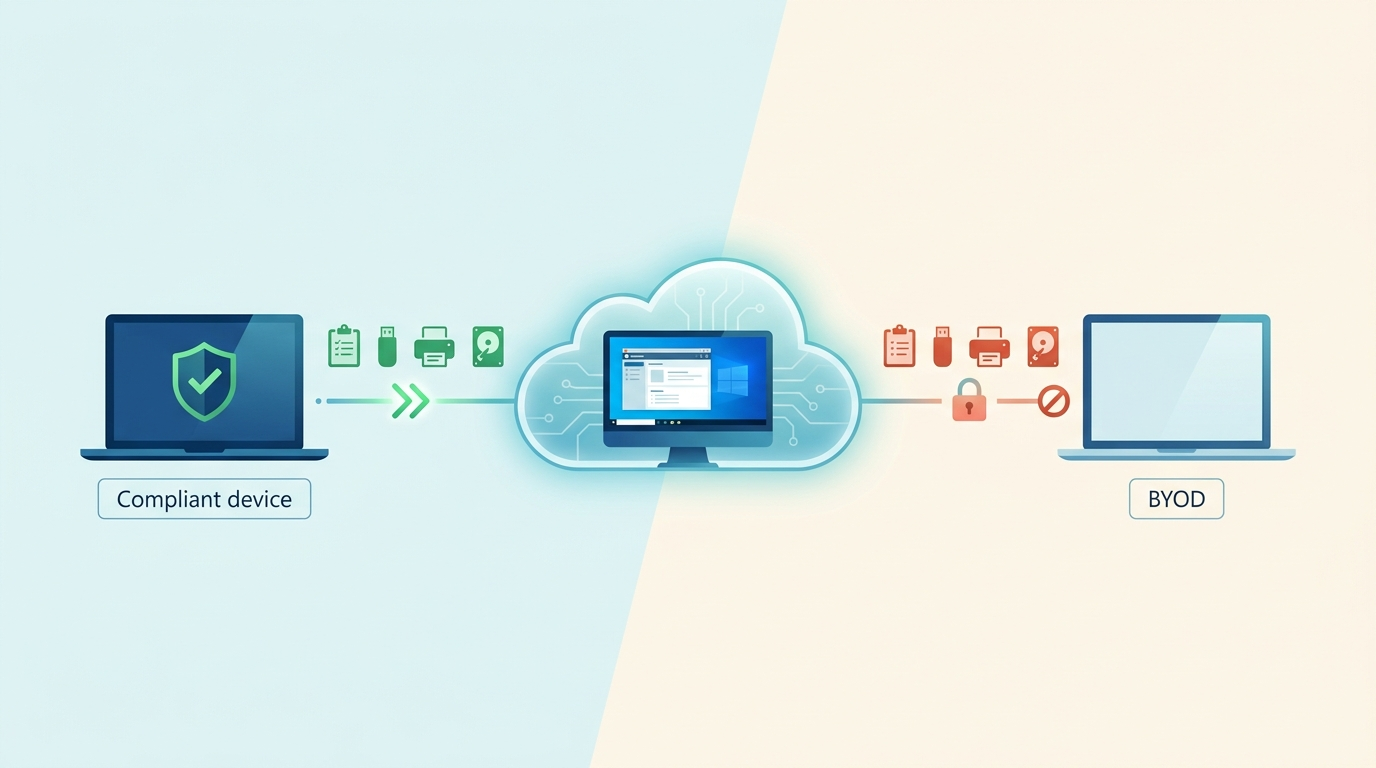
Did you know Microsoft now gives you granular control over clipboard, drive, printer, and camera redirection on your virtual desktops — based on who the user is, what device they’re on, and where they’re connecting from?
If you’re still running blanket on/off redirection policies on Azure Virtual Desktop (AVD) or Windows 365, you’re leaving a real security gap wide open. In this post I’ll walk through what context-based redirection actually is, how to configure it in Intune and the AVD/Windows 365 portals, and how to test it end to end.
The problem with on/off redirection
Redirection is what makes a virtual desktop feel local. When you connect to AVD or Windows 365, everything you see is running in Azure — but your clipboard, drives, printer, camera, and microphone all live on your local machine. Redirection bridges those local resources into the remote session.

Until recently, you had exactly two choices:
- Block everything. Tight security, but a terrible user experience — people can’t copy and paste, and the support tickets pile up.
- Allow everything. Happy users, but now corporate data is leaking out of your virtual desktops onto unmanaged personal devices.
There was no middle ground. And that’s a problem when your environment looks like most environments do: contractors logging in from unmanaged iPads sitting right next to internal staff on Intune-managed corporate laptops. Why would you give both groups the same redirection rules?

What context-based redirection changes
Microsoft’s answer is context-based redirection, and the key word is context. Instead of a blanket toggle, you can now say things like:
- If the user is on a managed, Intune-enrolled corporate device, allow clipboard redirection.
- If they log in from a personal iPad, block the clipboard and drives, and only allow printers you control.
You can base the decision on device compliance, OS version (is it patched and up to date?), network location, or specific Intune compliance and configuration policies. Best of all, the same policies and configuration work across both AVD and Windows 365.
What you need to configure
There are three pieces to wire together:
- An authentication context (in Conditional Access)
- A Conditional Access policy that applies it
- The redirection settings in the Windows 365 and/or AVD portal
Here’s how each one fits.
1. Create an authentication context
In the Conditional Access portal, create a new authentication context. Give it a clear description — for example, “BYOD policy for basic app redirection” — and assign it one of the available IDs (I used C3). Save it, and make sure Publish to apps is ticked.
This context is the glue that links your Conditional Access policy to the settings you’ll define later in the AVD or Windows 365 portal.

2. Create a Conditional Access policy
Next, create a Conditional Access policy that enforces the context. The logic is simple: if the device is compliant, apply the authentication context; if it isn’t, don’t allow it.
- Users: Select all users. (If you have a break-glass account, add it to Exclusions.)
- Access controls: Require the device to be marked as compliant. Your Intune compliance policy defines what “compliant” means — patched, Entra ID joined, known user, and so on.
- Enable policy: Switch it On.
One easy step to miss: under Target resources, choose Authentication context and select the context you just created (the BYOD clipboard-redirection one). Without this, the policy isn’t actually linked to your context. Save it.

3. Configure the portal settings
Windows 365: Go to Devices → Cloud PC settings and create a new remote connection experience — “Enable AVD redirection.” In the configuration settings for drives, folders, and redirection, apply your authentication context (C3) to each item. This maps everything back to the Conditional Access policy. Set your scope and assign it to your Windows 365 device group, then create.

Azure Virtual Desktop: Go to Host pools, select your host pool, and open RDP properties → Device redirection. You’ll see a new setting: Dynamically configure using authentication context. Historically you could only block or allow redirection per host pool — now you can do it dynamically. Select it, then choose the policy to apply for drive storage, clipboard, printer, and USB redirection.

Note: This feature is currently in public preview for AVD, so your host pool needs to be in the validation environment.
The one caveat that trips people up
By default, AVD and Windows 365 block these redirections. So if you have any Intune or Group Policy settings enforcing a block, you need to reverse them — allow everything at the policy level and let redirection make the final call. This is because the most restrictive setting wins. If you block clipboard at the Intune or GPO layer, context-based redirection simply won’t work, no matter how you’ve configured it.
Final thoughts
Context-based redirection is genuinely simple to set up once the three pieces click into place, and it closes a security gap that blanket policies never could. I hit one snag during setup — I had to recreate everything because of the public preview — but once it was configured, it just worked.
It’s still in public preview, so I wouldn’t recommend mass production deployment yet. But it’s absolutely worth trialing with a subset of users, especially in more security-conscious environments.
Have questions about setting it up? Drop them in the comments.
If you want to see the Microsoft documentation you can find it here https://learn.microsoft.com/en-us/azure/virtual-desktop/context-based-redirections-avd